Showing posts with label e-learning design. Show all posts

Tuesday, 18 August 2015

Giving Learners Options Through Navigation

During the “How to Design an e-Learning Program” course from the University of Toronto’s Continuing Education, I used an e-learning project that I’m presently creating at work to apply the various concepts I learned. The course I’m designing is for employees who need to learn to post information on our corporate intranet using Umbraco.

I was able to think through the e-learning course that I’m designing in order to teach to two very distinct types of learners. I call these the Tech-Savvy Learners, those who are comfortable learning new programs; and the Nervous Learners, those who are intimidated by technology and are sure that this will be difficult to learn.

I didn’t want to create two distinct courses and I was hoping that it wasn’t necessary. I learned that giving learners options for how they wish to go through the course is often a matter of navigation. I haven’t had the chance to test my navigation with learners yet, so I hope that it’ll work out.


Essentially the Tech-Savvy learners can read the introduction and instruction pages and then go directly to the intranet test site to practice what they’ve learned. Anyone who wants more information, or who is more visual, can choose to watch a demonstration. They can re-watch the demonstration or re-read the instructions. When they are ready, they can go practice what they learned.

The Tricks and Tips section is highly recommended but a learner can always use the Table of Contents to skip whatever they want.

Monday, 3 August 2015

Instructional Design Principles

It's done! Another course completed. This latest course was How to Design an e-Learning Program from the University of Toronto's Continuing Education. I have now completed 3 of the 5 courses for the E-learning Certificate. Yeah!

Even if I was familiar with most of the topics, it was great to learn about these in more detail. It turns out that following a few e-learning and design blogs has kept me up-to-date with what's happening. It was great to find other sources of information and inspiration through this course. I’ll be sharing some of these with you.

My intent was to write a post on what I learned in the course, but after reviewing my course notes and assignments, I have enough ideas for at least three posts. This is good news since this blog is neglected compared to my Quilting blog.

Here are some of the topics and ideas that stood out and how I’ve been able to apply some of these.

What I learned (Part 1):

Instructional Design Principles (or rules worth following when designing e-learning course)

My first assignment involved identifying instructional design principles to follow during the design of my project. Finding these on the internet wasn’t easy because they are rarely identified as principles. Here are some of my favourites, sorted by source. My observations are in the bullet
following the principle.
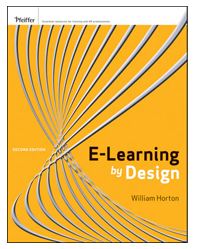
E-Learning by Design

E-Learning by Design by William Horton
  • Teach only what they “need to know”; what is essential; skills required in their jobs.
    • This can be difficult because we love learning and think everything is important. It’s not!
  • Ensure that they can skip what they already know and what they could learn on their own. 
    • The trick here is to make sure that they already know it or that they can come back if they find out they didn’t know it all.
  • Base the design on clear goals that are important to the organisation.
    • It was an interesting and worthwhile exercise to link the course goals to my organisation’s goals. 
Quick Survival Guide for Modern eLearning Designers
Quick Survival Guide 
A Quick Survival Guide for Modern eLearning Designers  (it’s a free download worth getting)
  • Use visuals to explain the content normally write out as a screen filled with bullet points.
    • An image can sometimes put the information in context. I really try to avoid the wall of words, whether it’s in e-learning or on the internet.
  • Every element of the design needs to have a purpose.
    • Excellent idea that applies to content as well as graphics etc.
  • If someone can say it better than you, then let them (link up to their blog, article or video).
    • Faculty Focus Blog
      Faculty Focus Blog
    • Not easy to do when things need to be bilingual but wise none-the-less.
  • Use a consistant format.
    • This is key for a professional looking product. Attention to detail is important here.
  • It takes longer than you think to create online content! 
    • Doesn't that apply to all project?
I’m not sure that I consciously kept these principles in mind, but I did use them. Not only are the principles relevant, but all three sources are excellent.

I hope that you have time to check these out!


Wednesday, 27 May 2015

Graphics in Elearning

I know that the numerous authors are correct about the importance of appropriate graphics in an elearning program. The key word is “appropriate”. Just as in web design, using an image that is not relevant is worse than not having any.

Graphics or images need to be:

  • Relevant or appropriate;
  • Understandable; and 
  • Useful in the communication of the ideas presented.

An example of a clean layout with consistent font, colour and shapes
A clean layout with consistent font, colour and shapes
As much as images are required, I believe that it’s just as important to use consistent font, colours and shapes (such as buttons). This makes the elearning look professional and helps users know what to expect. 

The other point is to avoid at all cost the “wall of words”. Using images is one way of breaking things up. In my opinion the best way to avoid the wall of words is to keep the words to an absolute minimum. This is done by conveying what is necessary and leaving out the “nice to know”. I have found a great resource in Lisa M. Russell’s documents, including Clean the Clutter of your Words. 

I have been reading and using the book, White Space is Not Your Enemy (WSINYE) by Rebecca Hagen & Kim Golombisky. It’s informative with lots of examples, both good and bad. I highly recommend it.
White Space is Not Your Enemy book cover
White Space is Not Your Enemy

As for designing graphics, I seriously looked into learning software more technical than PowerPoint, the Snipping Tool and Paint. I use Photoshop minimally but I decided to spend my energy deepening my knowledge of design and development of elearning rather than graphics. At this time in my career, having some knowledge of web design is more important than becoming a graphic artist. If I need to, I can always hire a graphic designer.

What I've learned:
  • I can't learn it all, especially if there is a steep learning curve! Graphic design will have to wait for a next life.
  • I have a much better chance at becoming good at elearning and web design than graphic design.
  • It's still pretty amazing what I can do with PowerPoint, the Snipping Tool and Paint!

Friday, 15 May 2015

Using Storyboards in E-learning Design

Storyboards were first used to design animation movies. They can also be useful in the design of e-learning. Storyboards come in all types of format - from paper, to Word or PowerPoint documents, to specialized storyboard tools such as Storyboard That. 
The Purpose of Storyboarding
For some interesting background, here is a great YouTube video, The Purpose of Storyboarding. 
I first started using storyboards about 5 years ago, after beginning to design my first e-learning course in PowerPoint (based on Jane Bozarth’s first edition of Better Than Bullet Points: Creating Engaging e-Learning with PowerPoint). I was having a great time creating an e-learning version of an in-class course I had created and taught but it wasn't clear where I was going with the course. After reading Connie Malamed's blog about storyboards, I downloaded the examples of storyboards found in her Storyboard Depot, adapted one and started using it.
I realise that I use a combination of storyboarding and designing directly in Adobe Captivate. After reading the articles on storyboards and wireframes (they are mostly used to design websites), in my How to Design an E-learning Program course, and watching the above video, I realise that I don’t use storyboards in a visual context. For me, it’s all about the content (text) and the flow. The visuals come later.
Storyboarding the Menu
After doing my initial research into my learners and what they need to know, I write a first draft of my learning objectives. This is where I also figure out if I can do the work in one module or if I should have a series of modules. I use good old fashion paper to get this done.
The Menu in Adobe Captivate
The Menu in Captivate
From my potential objectives, I prepare my introduction as well as plan out how to develop the module using the storyboard. I use the storyboard until I'm comfortable with my outline and where the module is heading. Once I have a path for my module, I usually start working in Captivate. My transfer from storyboard to Captivate is pretty intuitive. When I am doing more word smithing than planning, that’s usually where I go to Captivate.
I may end up doing the rest of the course directly in Captivate, but at one point I go back to the storyboard and copy the text, instructions, etc. from Captivate into it. I do this for a few reasons:
  • It's easier for the editor to review the course in the storyboard format;
  • I indicate the types and colour of the text boxes, info on the visuals and buttons I used as well as other techniques such as roll-over captions within the storyboard;
  • After potential students and my colleagues review the first published version of the course, I make the suggested changes in the storyboard. I use this version to make sure that everything is consistent. Then I make the changes in Captivate.
  • Once completed, I forward the storyboard to the translators. I put everything that needs to be translated in French in red within the storyboard;
  • Once it's translated, I copy the French text in a copy of the original version of the module in Captivate;
  • The French storyboard gets revised by the editor and I make the final minor changes to the French Captivate version.
I like using both the storyboard and Captivate to design my e-learning courses. 
Storyboarding the Main Panel Page

The Main Panel page in Adobe Captivate
The Main Panel Page in Adobe Captivate
 What I've learned:  

  • It's important that I not get bogged down with using a specific tool because I "should" rather than what works best for me.
  • I don't spend time with the visuals in my storyboard because honestly I can't draw (free motion quilting doesn't count) and I know that I would spend all of my time on the visuals. Visuals are important, but they have to support the ideas. It's best if I do these after I know where I'm going.