Storyboards were first used to design animation movies. They can also be useful in the design of e-learning. Storyboards come in all types of format - from paper, to Word or PowerPoint documents, to specialized storyboard tools such as Storyboard That.
 |
| The Purpose of Storyboarding |
I first started using storyboards about 5 years ago, after beginning to design my first e-learning course in PowerPoint (based on Jane Bozarth’s first edition of Better Than Bullet Points: Creating Engaging e-Learning with PowerPoint). I was having a great time creating an e-learning version of an in-class course I had created and taught but it wasn't clear where I was going with the course. After reading Connie Malamed's blog about storyboards, I downloaded the examples of storyboards found in her Storyboard Depot, adapted one and started using it.
I realise that I use a combination of storyboarding and designing directly in Adobe Captivate. After reading the articles on storyboards and wireframes (they are mostly used to design websites), in my How to Design an E-learning Program course, and watching the above video, I realise that I don’t use storyboards in a visual context. For me, it’s all about the content (text) and the flow. The visuals come later.
 |
| Storyboarding the Menu |
After doing my initial research into my learners and what they need to know, I write a first draft of my learning objectives. This is where I also figure out if I can do the work in one module or if I should have a series of modules. I use good old fashion paper to get this done.
 |
| The Menu in Captivate |
I may end up doing the rest of the course directly in Captivate, but at one point I go back to the storyboard and copy the text, instructions, etc. from Captivate into it. I do this for a few reasons:
- It's easier for the editor to review the course in the storyboard format;
- I indicate the types and colour of the text boxes, info on the visuals and buttons I used as well as other techniques such as roll-over captions within the storyboard;
- After potential students and my colleagues review the first published version of the course, I make the suggested changes in the storyboard. I use this version to make sure that everything is consistent. Then I make the changes in Captivate.
- Once completed, I forward the storyboard to the translators. I put everything that needs to be translated in French in red within the storyboard;
- Once it's translated, I copy the French text in a copy of the original version of the module in Captivate;
- The French storyboard gets revised by the editor and I make the final minor changes to the French Captivate version.
 |
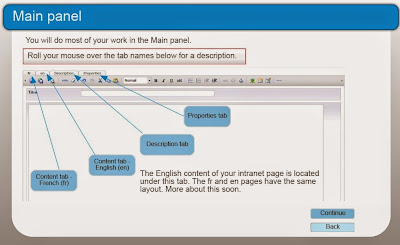
| Storyboarding the Main Panel Page |
- It's important that I not get bogged down with using a specific tool because I "should" rather than what works best for me.
- I don't spend time with the visuals in my storyboard because honestly I can't draw (free motion quilting doesn't count) and I know that I would spend all of my time on the visuals. Visuals are important, but they have to support the ideas. It's best if I do these after I know where I'm going.


No comments:
Post a Comment